
Waxed Canvas Backpack Packing Guide for Hiking 2026 – Woosir Skip to content

10% OFF on Your First Order, coupon code: WS10

How to Pack a Waxed Canvas Backpack for Hiking and Adventure Travel: A 2026 Trail-Ready Guide

by Woosir Editorial Team 26 Aug 2026 0 comments
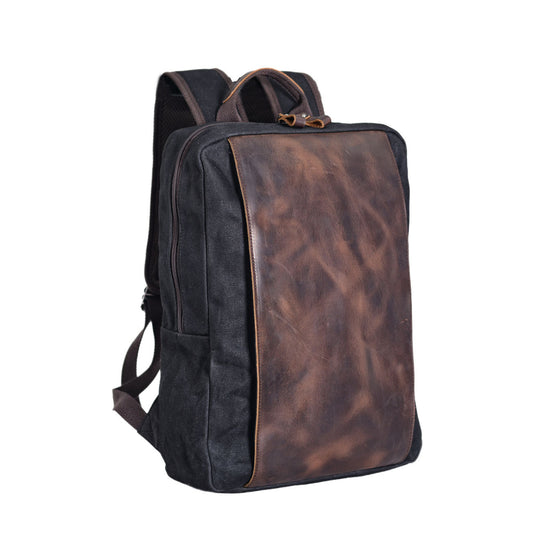
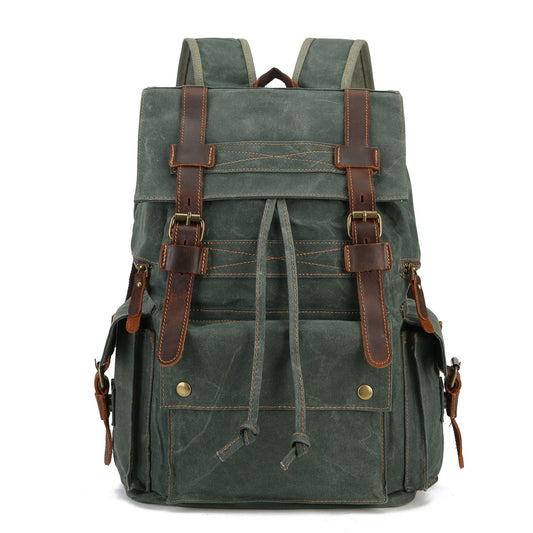
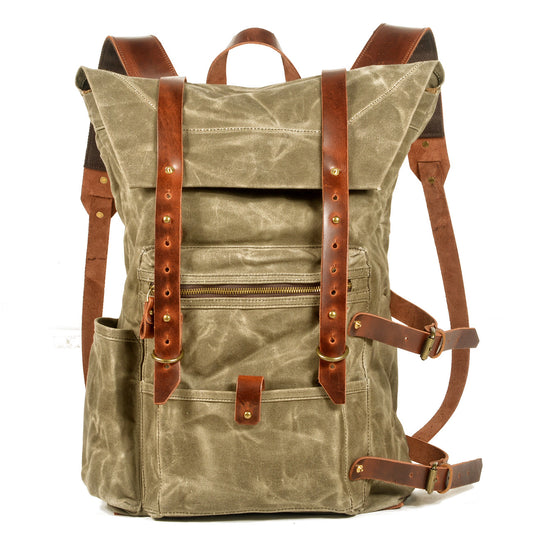
Waxed canvas backpack for hiking and adventure travel

A waxed canvas backpack is one of the most versatile pieces of gear a traveler can own. Whether you are hiking the trails of Patagonia, commuting to a trailhead in the Alps, or catching a sleeper train through Southeast Asia, the right packing system turns a good bag into a great one. In this 2026 guide we walk through a field-tested method for packing a waxed canvas backpack for hiking and adventure travel, with regional tips for Europe, Asia, and the Americas, plus the small habits that keep your gear dry, organized, and easy to reach on any journey.

Why Choose a Waxed Canvas Backpack for the Trail

Waxed canvas combines the toughness of heavy cotton with a water-resistant wax coating. Unlike nylon, it does not show every scuff, and it earns a patina that many long-term travelers prefer. For hiking and adventure travel, a waxed canvas backpack offers quiet reliability: it shrugs off light rain, carries weight comfortably, and looks equally at home in a mountain lodge or a city cafe.

The material breathes better than most synthetics, which keeps contents from getting clammy on humid days. It is also remarkably easy to repair in the field. A torn seam can be re-stitched with a basic kit, and a tired finish can be renewed with a block of wax. That longevity is exactly why a waxed canvas backpack has become a favorite among slow travelers, bikepackers, and thru-hikers who would rather buy once than replace every season.

Weight is the one trade-off worth naming. A 16 to 18 ounce canvas pack weighs a little more than a featherlight nylon frame bag, but the comfort of a centered load and the durability of riveted stress points usually win out for travelers who carry the same bag for years. If you fly to your trailhead, the slightly heavier pack still fits as a personal item at 28 to 35 liters, which keeps your gear with you instead of in the aircraft hold where it can be delayed or damaged.

Anatomy of a Trail-Ready Waxed Canvas Backpack

Before you pack, understand the features that make a waxed canvas backpack trail-capable. The fabric weight, measured in ounces per square yard, sets the tone: 12 oz canvas is light and flexible for day hikes, while 18 oz canvas stands up to week-long treks and bus rides across continents. Heavier canvas also holds its shape when half empty, which matters when you are living out of the bag between stops.

The harness matters more than the logo. Look for padded shoulder straps that curve to the chest, a removable hip belt to transfer weight on long climbs, and a sternum strap to stop the load from swinging. Hardware should be solid brass or forged nickel, not pot-metal zippers that corrode after one salty coastal hike. A roll-top or storm flap closure keeps rain out better than a single zipper, and side compression straps let you shrink the pack as supplies dwindle on a multi-day route.

Packing Cubes and Inserts That Actually Help

Waxed canvas backpack for hiking and adventure travel

A waxed canvas backpack has soft walls, so without structure your gear migrates. The fix is a small set of packing cubes and a rigid insert. Use one cube for base layers, one for outer layers, and a flat cube for documents and electronics. A lightweight plastic folder or a folded cutting board in the back panel gives the bag a spine, protects the laptop, and stops pointy items from poking your back on long carries.

Keep cubes a size smaller than the compartment so air and small items can fill the gaps. Color-code them: red for first-aid, blue for electronics, green for layers. On a busy travel day you can pull one cube without unpacking the whole waxed canvas backpack, which is the entire point of a system over a stuff-sack habit.

The Five-Zone Packing System

A waxed canvas backpack performs best when you pack by zone rather than by category. This system keeps weight centered, protects fragile items, and puts essentials within reach without a full unpack.

Zone 1 — Bottom: Bulky and Infrequent

Place your sleeping bag, spare clothes, or a packed cube of laundry at the bottom. These items are dense, forgiving, and rarely needed mid-day, so they form a stable base that stops the load from shifting on switchbacks and protects everything above from trail grit.

Zone 2 — Core: Weight Centered

Your heaviest items — a water reservoir, a paperback, a camera body, a food bag — belong against your back, centered between the shoulder blades. A centered load is the single biggest factor in all-day comfort, and it keeps the pack from pulling you backward on steep descents where a poorly balanced bag becomes a real hazard.

Zone 3 — Top: Frequent Access

Rain jacket, snacks, and a buff go at the top where you can grab them without opening the whole bag. On a waxed canvas backpack the roll-top or flap makes this zone especially easy to reach during a sudden squall, so you are not fully exposed while fumbling for a shell.

Zone 4 — Front Pocket: Flat Items

Maps, permits, a folded tote, and your first-aid card slide into the flat front pocket. Keeping them flat protects them from creasing and speeds up trailhead checks with rangers or transit staff who need to see your paperwork quickly.

Zone 5 — Shoulder Strap: True Essentials

A small strap pouch holds lip balm, a micro multitool, and a single energy gel. This is the do-not-dig layer for moving moments when you cannot stop and shrug the pack off, such as crossing a busy junction or stepping off a moving train.

Weight Distribution and Harness Fit

Packing and fitting are two halves of the same comfort equation. Once the load is centered in Zone 2, tighten the hip belt first so the weight rides on your hips, not your shoulders, then clip the sternum strap to lock the shoulder straps in place. The top of the pack should sit roughly at the top of your shoulders; if it rides low, the bag is either too big or packed bottom-heavy. A well-fitted waxed canvas backpack disappears after the first mile, which is the best review a travel pack can earn.

Capacity Cheat Sheet by Trip Length

Use this table to size your load before you leave home, then pack to the plan rather than to the space available:

Trip Length Recommended Volume Core Items
1–2 days 20–28 L Day layers, water, snacks, rain shell
3–5 days 28–35 L Sleep system, 2–3 outfits, cook kit
6+ days 35–45 L Bulk food, extra fuel, spare footwear

Most adventure travelers who fly to a trailhead do best at 28 to 35 liters, which still qualifies as a personal item or small carry-on on most airlines. A bigger bag tempts you to overpack, and every extra pound costs you on the climb, so resist the urge to size up for a trip that needs less.

Packing for Different Adventure Types

Day Hikes and Summit Pushes

For a single-day outing, keep the waxed canvas backpack lean: water, a layer, food, and the ten essentials. Leave the sleep system at the trailhead locker and treat the pack as a day-trip shell that you can grab and go without a packing ritual.

Multi-Day Treks

On a hut-to-hut or backcountry trek, the bottom zone earns its keep. Compress the sleep system, hang the food bag outside if regulations require it, and keep a dedicated dry cube for electronics no matter the forecast. Resupply boxes along the route let you start light and refill instead of carrying a week of weight from day one.

Hiking Plus Remote Work

Many travelers combine a trek with remote work. Split the core: a padded sleeve for the laptop on one side, trail gear on the other, and a quick-grab pouch for your passport and transit card so you are not unpacking at every border or cafe power outlet. This hybrid load is where a structured waxed canvas backpack beats a floppy daypack.

Regional Trail Notes

Europe — Alps, Dolomites, Scottish Highlands

Hut-to-hut routes across the Alps and Dolomites mean you carry less sleep gear but more layers for sudden weather. A waxed canvas backpack handles the frequent drizzle of the Scottish Highlands well; pack a packable shell and keep electronics in a dry cube. Coin lockers in alpine train stations let you stage a smaller day load while your big pack waits safely, and the rigid structure of canvas survives being stuffed into a busy locker better than a frameless sack.

Asia — Himalayas, Japanese Alps, Northern Vietnam

High humidity and monsoon seasons dominate much of Asia, so ventilation matters as much as water resistance. Choose a frame that keeps the pack slightly off your back, and line the core with a dry bag during the rainy season. In the Japanese Alps, the efficient locker culture at trail stations lets you send a resupply box ahead and hike with a lighter waxed canvas backpack, while in Northern Vietnam a rain cover and a dry cube keep your camera and documents safe on humid jungle tracks.

Americas — Patagonia, Rockies, Andes

Patagonian wind is legendary, and it arrives without warning. Cinch compression straps tight, keep a wind layer in Zone 3, and expect altitude swings in the Rockies and Andes that make a layered system far better than one heavy jacket. A waxed canvas backpack takes the abuse of scree and granite better than thin nylon, and the abrasion resistance pays off on scrambles where the pack scrapes the rock.

Security on the Trail and in Transit

Adventure travel often mixes wild country with crowded transport. On buses and trains, wear the waxed canvas backpack on your front in dense terminals, keep Layer 3 essentials zipped, and use a small cable lock through a daisy chain to fix the pack to a seat frame when you doze. Crowded markets from Bangkok to Lima are where a simple zipper pull can be the difference between a calm trip and a ruined one, so keep valuables deep in Zone 2.

Water, Weather and the Wax Finish

The wax coating sheds light rain, but it is not a dry bag. For downpours, line the core with a trash-compactor bag or pack a dedicated rain cover. Re-wax once or twice a year, or whenever water stops beading on the surface. A small tin of canvas wax weighs almost nothing and extends the life of your waxed canvas backpack for years of hard use.

If your pack gets soaked, do not steam it dry near a stove. Air-dry it away from direct heat, then re-wax once it is fully dry. The fabric will stiffen in cold weather and relax in warmth, and that is normal; it is part of the character that makes a waxed canvas backpack feel personal over time, and a reason travelers keep the same bag for a decade.

Adventure Travel Essentials to Pack

  • A minimal first-aid kit with blister care and tape
  • A screw-top water bottle or a reservoir
  • A headlamp with spare batteries
  • A packable rain shell that stuffs into its own pocket
  • A lightweight repair tape roll for fabric and gear
  • Sun protection, a buff, and lip balm
  • Offline maps on a charged device, plus a paper backup
  • A dry cube for electronics in humid or wet regions
  • A small cable lock for buses and trains

Packing Mistakes to Avoid

  • Overpacking the top zone, which pulls the bag backward
  • Letting the heaviest item ride at the base instead of the core
  • Forgetting a dry bag for electronics in monsoon regions
  • Using the shoulder strap pouch for anything you cannot afford to lose
  • Skipping a packing cube system that lets you find things fast
  • Carrying a 45-liter pack for a trip that needs 28
  • Neglecting to re-wax until the fabric is already saturated

Frequently Asked Questions

Can a waxed canvas backpack handle heavy rain?
It sheds light rain well but is not fully waterproof. Use a liner or rain cover in sustained downpours, and keep electronics in a dry cube so a soaked pack never means a ruined device.

How do I stop the bottom from getting damp?
Keep a closed-cell pad or a dry bag under Zone 1, and never set the bag directly on wet ground. A small foam sit-pad doubles as both cushion and ground barrier.

Is waxed canvas too heavy for long hikes?
Modern 16 to 18 ounce canvas is comparable to heavy nylon packs. The comfort gain from a centered load and a good harness usually outweighs the small weight penalty for most travelers.

How often should I re-wax?
Once or twice a year for regular use, or whenever water stops beading on the fabric. A quick thumb test in the sink tells you when it is time to refresh the finish.

Can I take it as carry-on?
At 28 to 35 liters most waxed canvas backpacks fit as a personal item or small carry-on. Check your airline's sizer before you fly, and keep the top zone clear for the gate check.

Will the wax stain my clothes?
Freshly waxed canvas can transfer a little wax in hot weather. Let a new coat cure for a day and avoid tight light-colored layers against the pack on the first hot hike.

Conclusion

Packing a waxed canvas backpack for hiking and adventure travel is less about stuffing and more about system. Use the five zones, add structure with cubes and an insert, match capacity to trip length, fit the harness, and adapt to regional weather while respecting the wax finish. When you are ready to upgrade your gear, browse our waxed canvas bags and pair your pack with a hiking backpack built for the trail. A well-packed waxed canvas backpack will outlast seasons of adventures, so build your system today and hit the trail with confidence.

New Arrival

Best Sellers

Close
Edit Option
Close
Notify Me
Close
Login Close
My Cart (0) Close